


Have you ever wanted to share a local server (local host) with someone else remotely with live changes or as you work on that project? Well, Ngrok is your to-go-tool for this.
Ngrok is a software service developed by Alan Shreve, clearly a genius, who often goes by the name “Inconshreveable”.
Ngrok is a cross-platform application that exposes local server ports to the Internet. Ngrok is an application that gives you external (internet) access to your private systems hidden behind NAT or a firewall.
🌟 Can Ngrok be trusted?
ngrok Secure Tunnels allow you to instantly open access to remote systems without touching any of your network settings or opening any ports on your router. This means you get a secure, reliable tunnel for your developer box, IoT device, or just about anything with internet access.
🌟 Hello World API
So to get started; Let's assume this hello world app in flask;
Suppose you have a simple application that returns JSON data(API) and it's running on a local host but you want to serve it to someone in the USA (far from you) via the internet and it's not hosted anywhere yet.
This is the code of that simple site;
from flask import Flask, jsonify, request

app = Flask(__name__)


@app.route('/', methods=['GET'])
def helloworld():
    if(request.method == 'GET'):
        data = {"data": "Hello World"}
        return jsonify(data)


if __name__ == '__main__':
    app.run(debug=True)
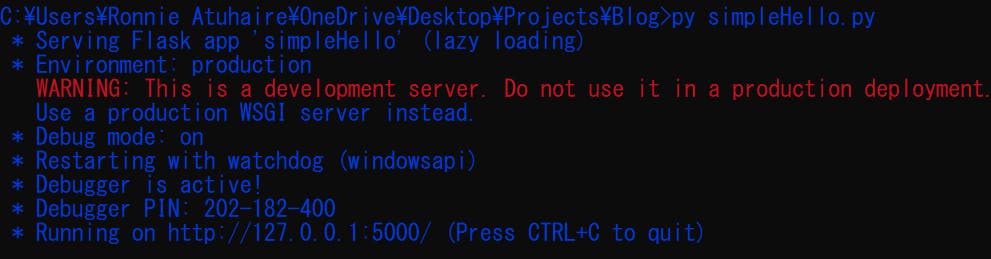
When you run the above file, it runs on port 5000 by default.

🌟 Getting Started
Now to get started, first download ngrok here on your system; The instructions are clear for the different installations;
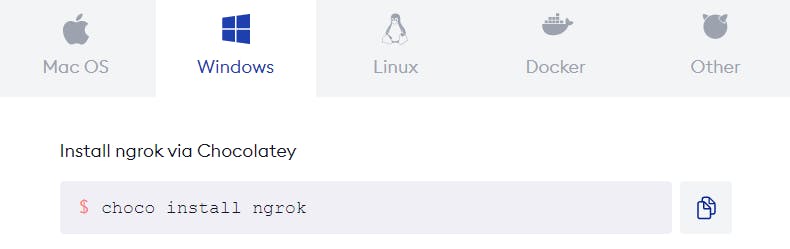
I already have it on my Windows but if I would do it again, I would use PowerShell (Admin) to run;
choco install ngrok
Now that the ngrok agent is installed, let's connect it to your ngrok Account. If you haven't already, sign up (or log in) to the ngrok Dashboard and get your Authtoken. The ngrok agent uses the Authtoken (sometimes called tunnel credential) to log into your account when you start a tunnel.
Copy the value and run this command to add the Authtoken in your terminal.
ngrok config add-authtoken TOKEN
Replace TOKEN with your Authtoken
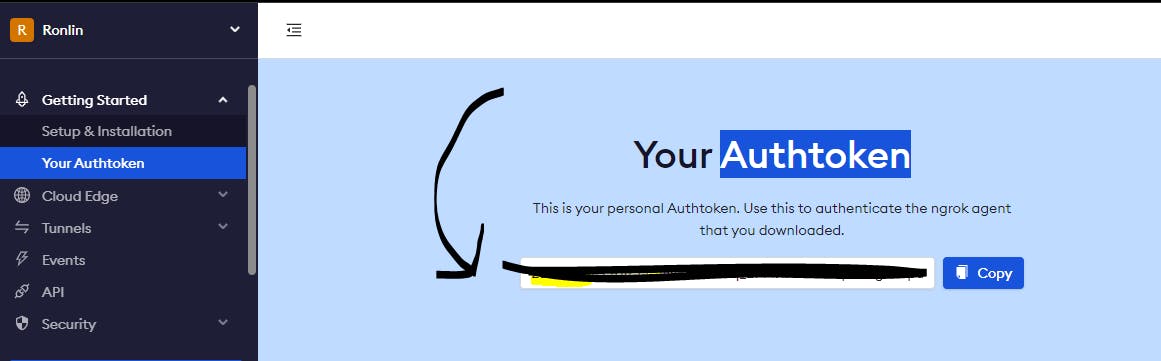
The Authtoken will help you in configuring ngrok to your system and it's a one-time thing.
Now let's redirect to ngro from local host;
🔸 First, run your app
py simpleHello.py
🔸 Then serve with ngrok in another terminal;
ngrok http 5000
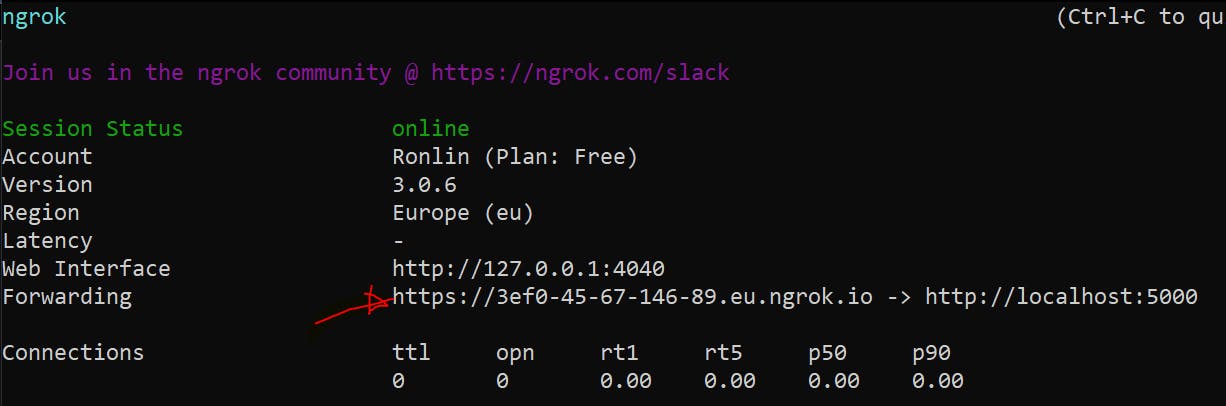
Note the lines beginning with Forwarding. These show the public URL that ngrok uses to redirect requests into our service.
It has a web interface for you to see what's happening and the https URL for sharing. Now you can copy the Forwarding URL and share it with everyone;
Mine at a time would be;
https://3ef0-45-67-146-89.eu.ngrok.io
✨✨ Yay! You are live on the internet and exposed to everyone with the URL.
There will be some limitations since it is a free account and you might have a few hours and one agent session at a time.
🌟 Alternatives
Top Alternatives to ngrok that you could try to use to achieve the same thing;
- NGINX
- Heroku
- PageKite
- Postman.
- Termius.
- MAMP
And many more around the web;
Soon dropping video implementation >>> Stay Tuned!
🌟 Conclusion
Once again, I hope you learned something today from my little closet.
Please consider subscribing or following me for related content, especially about Tech, Python & General Programming.
You can show extra love by buying me a coffee to support this free content and I am also open to partnerships, technical writing roles, collaborations, and Python-related training or roles.

📢 You can also follow me on Twitter : ♥ ♥ Waiting for you! 🙂